I've been on the hunt for a piece of furniture that resembled a butcher block but with more dramatic coloration for a reasonable price. Of course that doesn't exist on my budget so I moseyed on over to ye ole faithful Amazon and Home Depot to attempt to DIY my vision. Like every project I seem to take on there was one small fail, however, I am pleasantly pleased with how this one turned out and am ready to start on a second one -- let's be real, the second one has been sitting in my basement half finished for months now. But when the motivation bug bites again, at least I have my ducks in a row!
WHAT IS IT?
It's a ton of stained paint stirrers glued onto a piece of plywood with hairpin legs.
I used a 4' x 8' piece of pre-sanded 1/2" thick plywood
WHAT YOU NEED:
Here's what I bought:
- Plywood
- Paint Stirrers
- Table Legs
- Stain (1, 2, 3 & 4) I ended up mixing #3 and #4 together to get it a little darker. I highly recommend buying the smallest can you can find - you won't use that much.
- Liquid Nails
Other items that I used:
- Screws
- Gloves
- Sander or Sand Paper
- Painters Tape
- Some type of weight
Dark Walnut is one of my favorite stains - we used it on our floors (hence the large can). I also used Ebony, Driftwood and Special Walnut for this project.
I bought 30" hairpin legs and they seem to be a great height for what we use the table for.
THE PROCESS:
Putting this together was relatively simple. I started by sanding the edges of the plywood. Once everything was as smooth as butter, I threw a layer of dark walnut stain on both sides of the plywood.
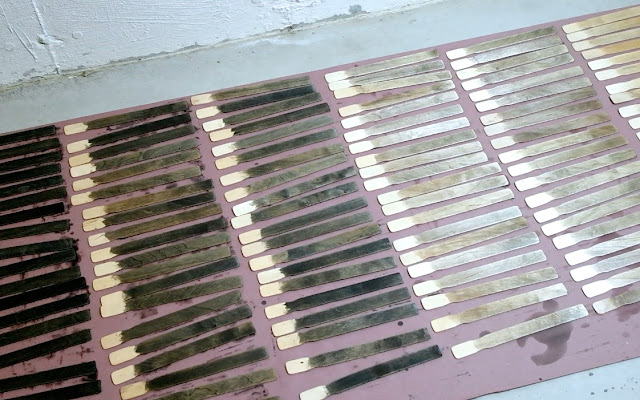
I divided the stirrers up evenly into four different section and stained them one by one (wearing gloves is a must if you don't want to go into work the next day with multicolored digits).
My project manager overseeing my work. He has high standards - after all it did end up going in his room.
Voila! Pat yourself on the back, this part can take awhile!
Once the stirrers were dried, I cut the ends off with a miter saw and laid them out on the plywood in a somewhat random pattern. Once everything looked good, I broke out the liquid nails!
I used a few weights to keep everything in place overnight.
I'm shocked the sawhorses weren't crushed.
Final step is to screw on the legs. I used painter's tape to help measure where I wanted them to line up.
WHAT YOU SHOULDN'T DO:
Lesson learned. Do not poly this table. I tried this and the poly caused a handful of the stirrers to warp and pull away from the plywood. I ended up having to rip them up and replace them entirely.
SOMETHING TO THINK ABOUT:
I will be buying a piece of glass to put over this table to prevent dirt and other shenanigans from getting down in between the stirrers and to also create a flat surface. It's a gamble every time I put a beverage on top of it right now as it is slightly uneven with all the stirrers.
TO SUM IT UP:
I LOVE THIS TABLE. I'm pleased with how it turned out and receive compliments on it frequently. I love that it incorporates different colors of wood which makes it easy to decorate the room. Almost everything matches it... especially the floors! I moved it into the "dog room" which I am slowly transitioning into the dog room/office to serve as a desk.


No comments:
Post a Comment